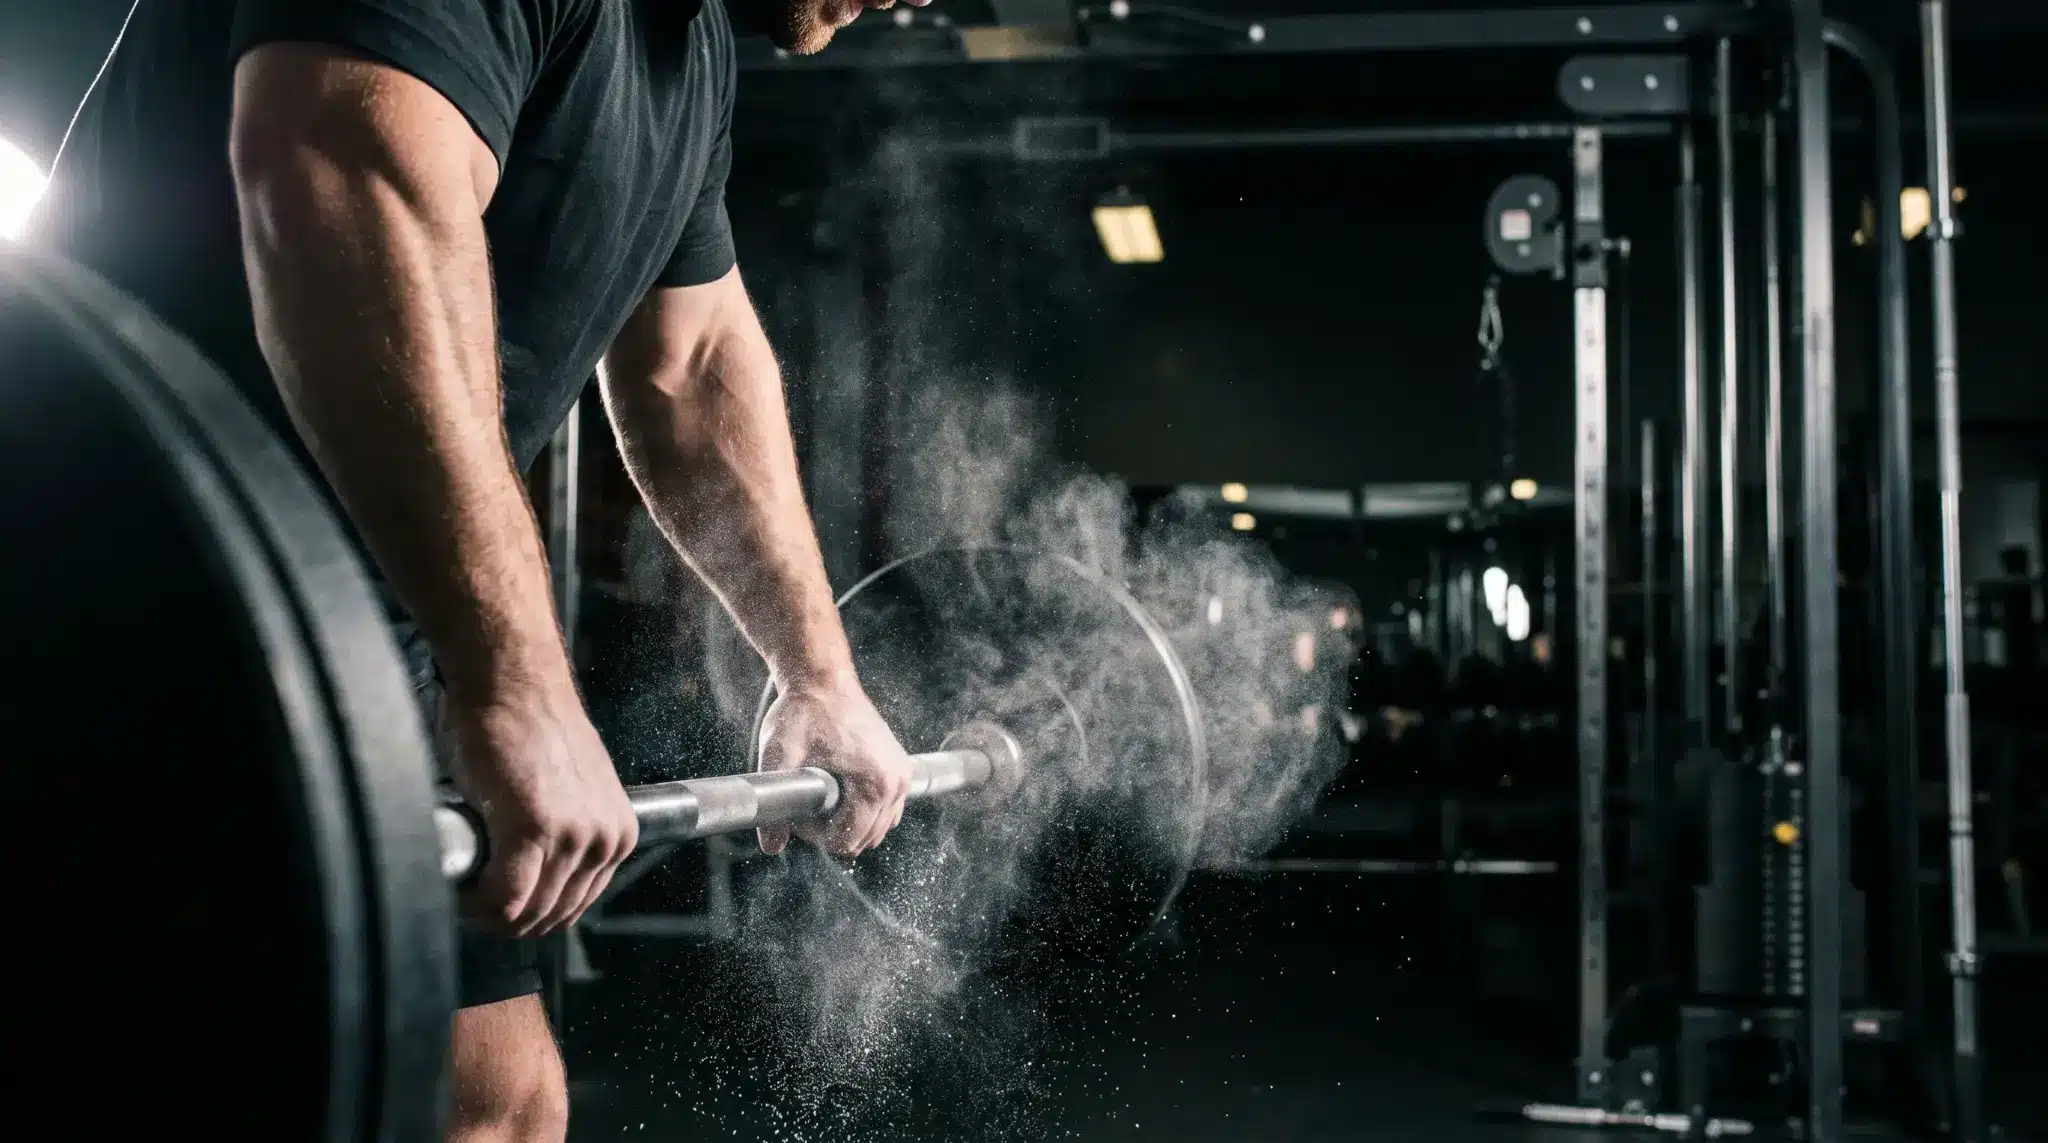
A pull day targets your back, biceps, and rear delts with exercises like rows, pulldowns, and curls. It helps build back width, thickness, and pulling strength while supporting better posture.
This post covers what a pull day is, the best exercises to include, recommended sets and reps, and the mistakes that can slow your progress.
What Is a Pull Day Workout?
A pull day workout is a training session focused on pulling movements that bring weight toward your body or lift it from the ground. These exercises mainly train the back, biceps, and rear delts.
It is one part of the push-pull-legs (PPL) split. Push day targets the chest, front shoulders, and triceps, while leg day focuses on the lower body.
A typical pull workout starts with heavy compound exercises like deadlifts, rows, or pulldowns, then moves to isolation exercises like curls and rear-delt work. This structure lets you train related muscles together while giving each group enough time to recover.
What Muscles Does a Pull Day Work?
A pull day targets every muscle involved in pulling weight toward your body or off the floor. The table below shows each muscle group, its role, and the main exercise that trains it.
|
Muscle Group |
Main Job |
Primary Exercise |
|---|---|---|
|
Lats |
Pull your arms down and in |
Lat pulldown, pull-up |
|
Traps |
Stabilize shoulder blades |
Barbell row, deadlift |
|
Rear Delts |
Pull shoulders back |
Face pull |
|
Lower Back |
Support the spine during pulls |
Deadlift |
|
Biceps |
Bend the elbow |
Curl variations |
|
Forearms and Grip |
Hold the weight steady |
Any loaded pull |
The lats and traps do most of the work. Your biceps and rear delts act as secondary movers. Your grip gets trained on nearly every exercise in the session.
A balanced pull day includes two types of pulling: vertical pulls (pulldowns, pull-ups) target the lats and build back width. Horizontal pulls (rows) target the mid-back, rhomboids, and traps to build thickness. Both are needed for a complete back.
How to Warm Up Before Pull Day
A short warm-up increases blood flow to the muscles you are about to load. It also lowers your injury risk on heavy lifts. Spend five to ten minutes on these before your first working set.
- Band pull-aparts: 2 sets of 15 reps. These wake up the rear delts and upper back before you load them.
- Arm circles: 30 seconds forward, 30 seconds back. This loosens the shoulder joints.
- Bodyweight rows or light lat pulldowns: 2 light sets. These prime the movement patterns you are about to load heavy.
Jumping straight to a heavy deadlift with cold muscles raises your injury risk. A few minutes of prep work protects the rest of your session.
Pull Day Workout Routine
This pull workout routine runs in order from heaviest compound to lightest isolation work. You do the hardest sets while your energy is highest and finish with focused, lower-load moves. Use this as your session blueprint.
|
Order |
Exercise |
Sets |
Reps |
Rest |
|---|---|---|---|---|
|
1 |
Deadlift |
3 |
5 |
2–3 min |
|
2 |
Pull-Up or Lat Pulldown |
3 |
8–10 |
90 sec |
|
3 |
Barbell Row |
3 |
8 |
90 sec |
|
4 |
Single-Arm Dumbbell Row |
3 |
10 per side |
75 sec |
|
5 |
Seated Cable Row |
3 |
10–12 |
75 sec |
|
6 |
Face Pull |
3 |
12–15 |
60 sec |
|
7 |
Barbell or Dumbbell Curl |
2–3 |
10 |
60 sec |
|
8 |
Hammer Curl |
2–3 |
10–12 |
60 sec |
Beginners: Start with exercises 2, 4, 5, 6, and 7. That gives you a solid four-to-five exercise session with a lower injury risk. Add the deadlift and barbell row once your form on the basics is solid.
Training frequency: Training your pull muscles twice a week tends to produce better results than training them once. If you follow a three-day PPL split, consider adding a second pull session. That extra frequency helps your back and biceps grow faster.
The Best Pull Day Exercises
The best pull day exercises fall into two groups. Compound lifts train several muscles at once and come first in your session. Isolation moves target one muscle and work best at the end, when your bigger muscles are already fatigued.
1. Deadlift
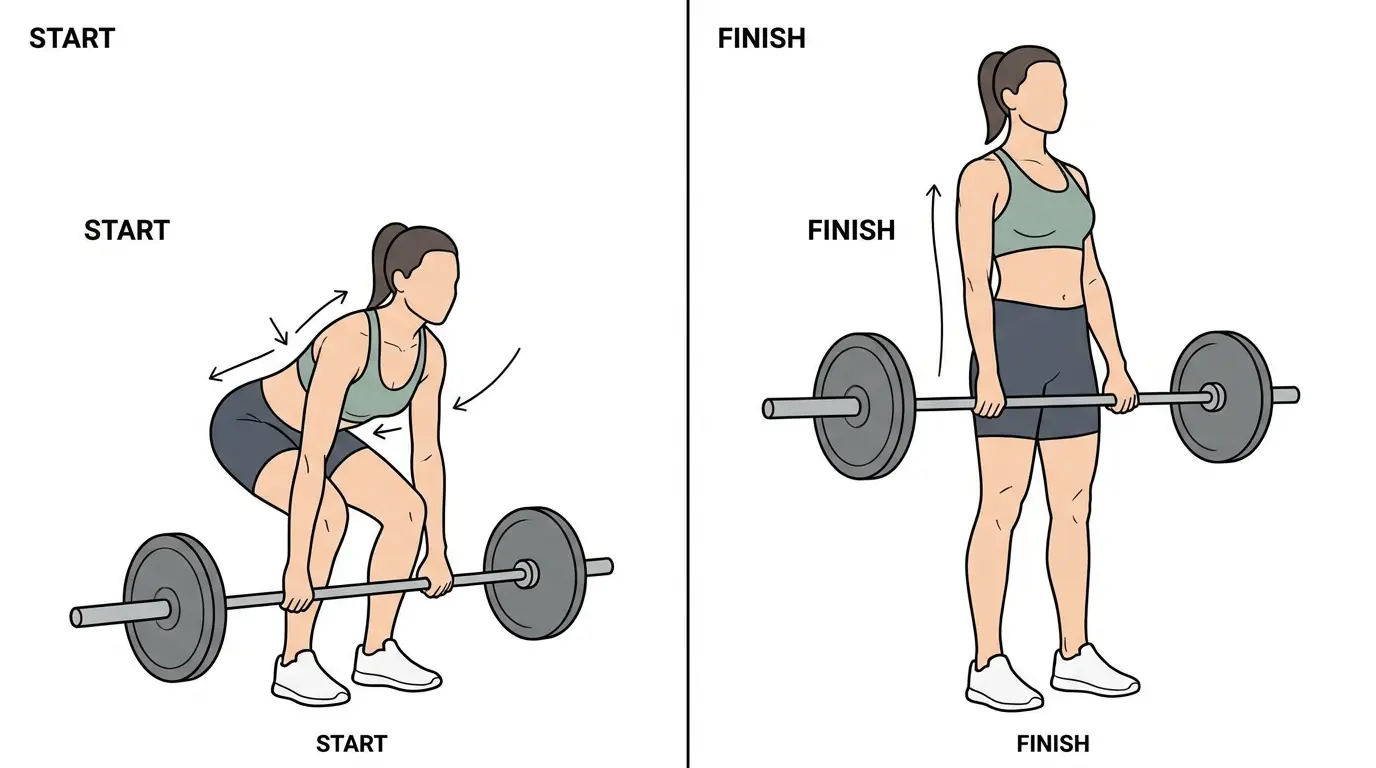
The deadlift trains your entire posterior chain: glutes, hamstrings, lower back, lats, and grip. It builds more raw strength than almost any other exercise on this list.
How to do it:
- Stand with feet hip-width apart, bar over your midfoot.
- Bend your hips and knees to grip the bar just outside your shins.
- Brace your core and pull your shoulders back.
- Push through your heels and stand tall, keeping the bar close to your body.
- Lower it back down with control.
Sets and reps: 3 sets of 5 reps.
No barbell? Swap in a Romanian deadlift with dumbbells. The movement pattern and muscle focus stay the same.
2. Pull-up or lat pulldown
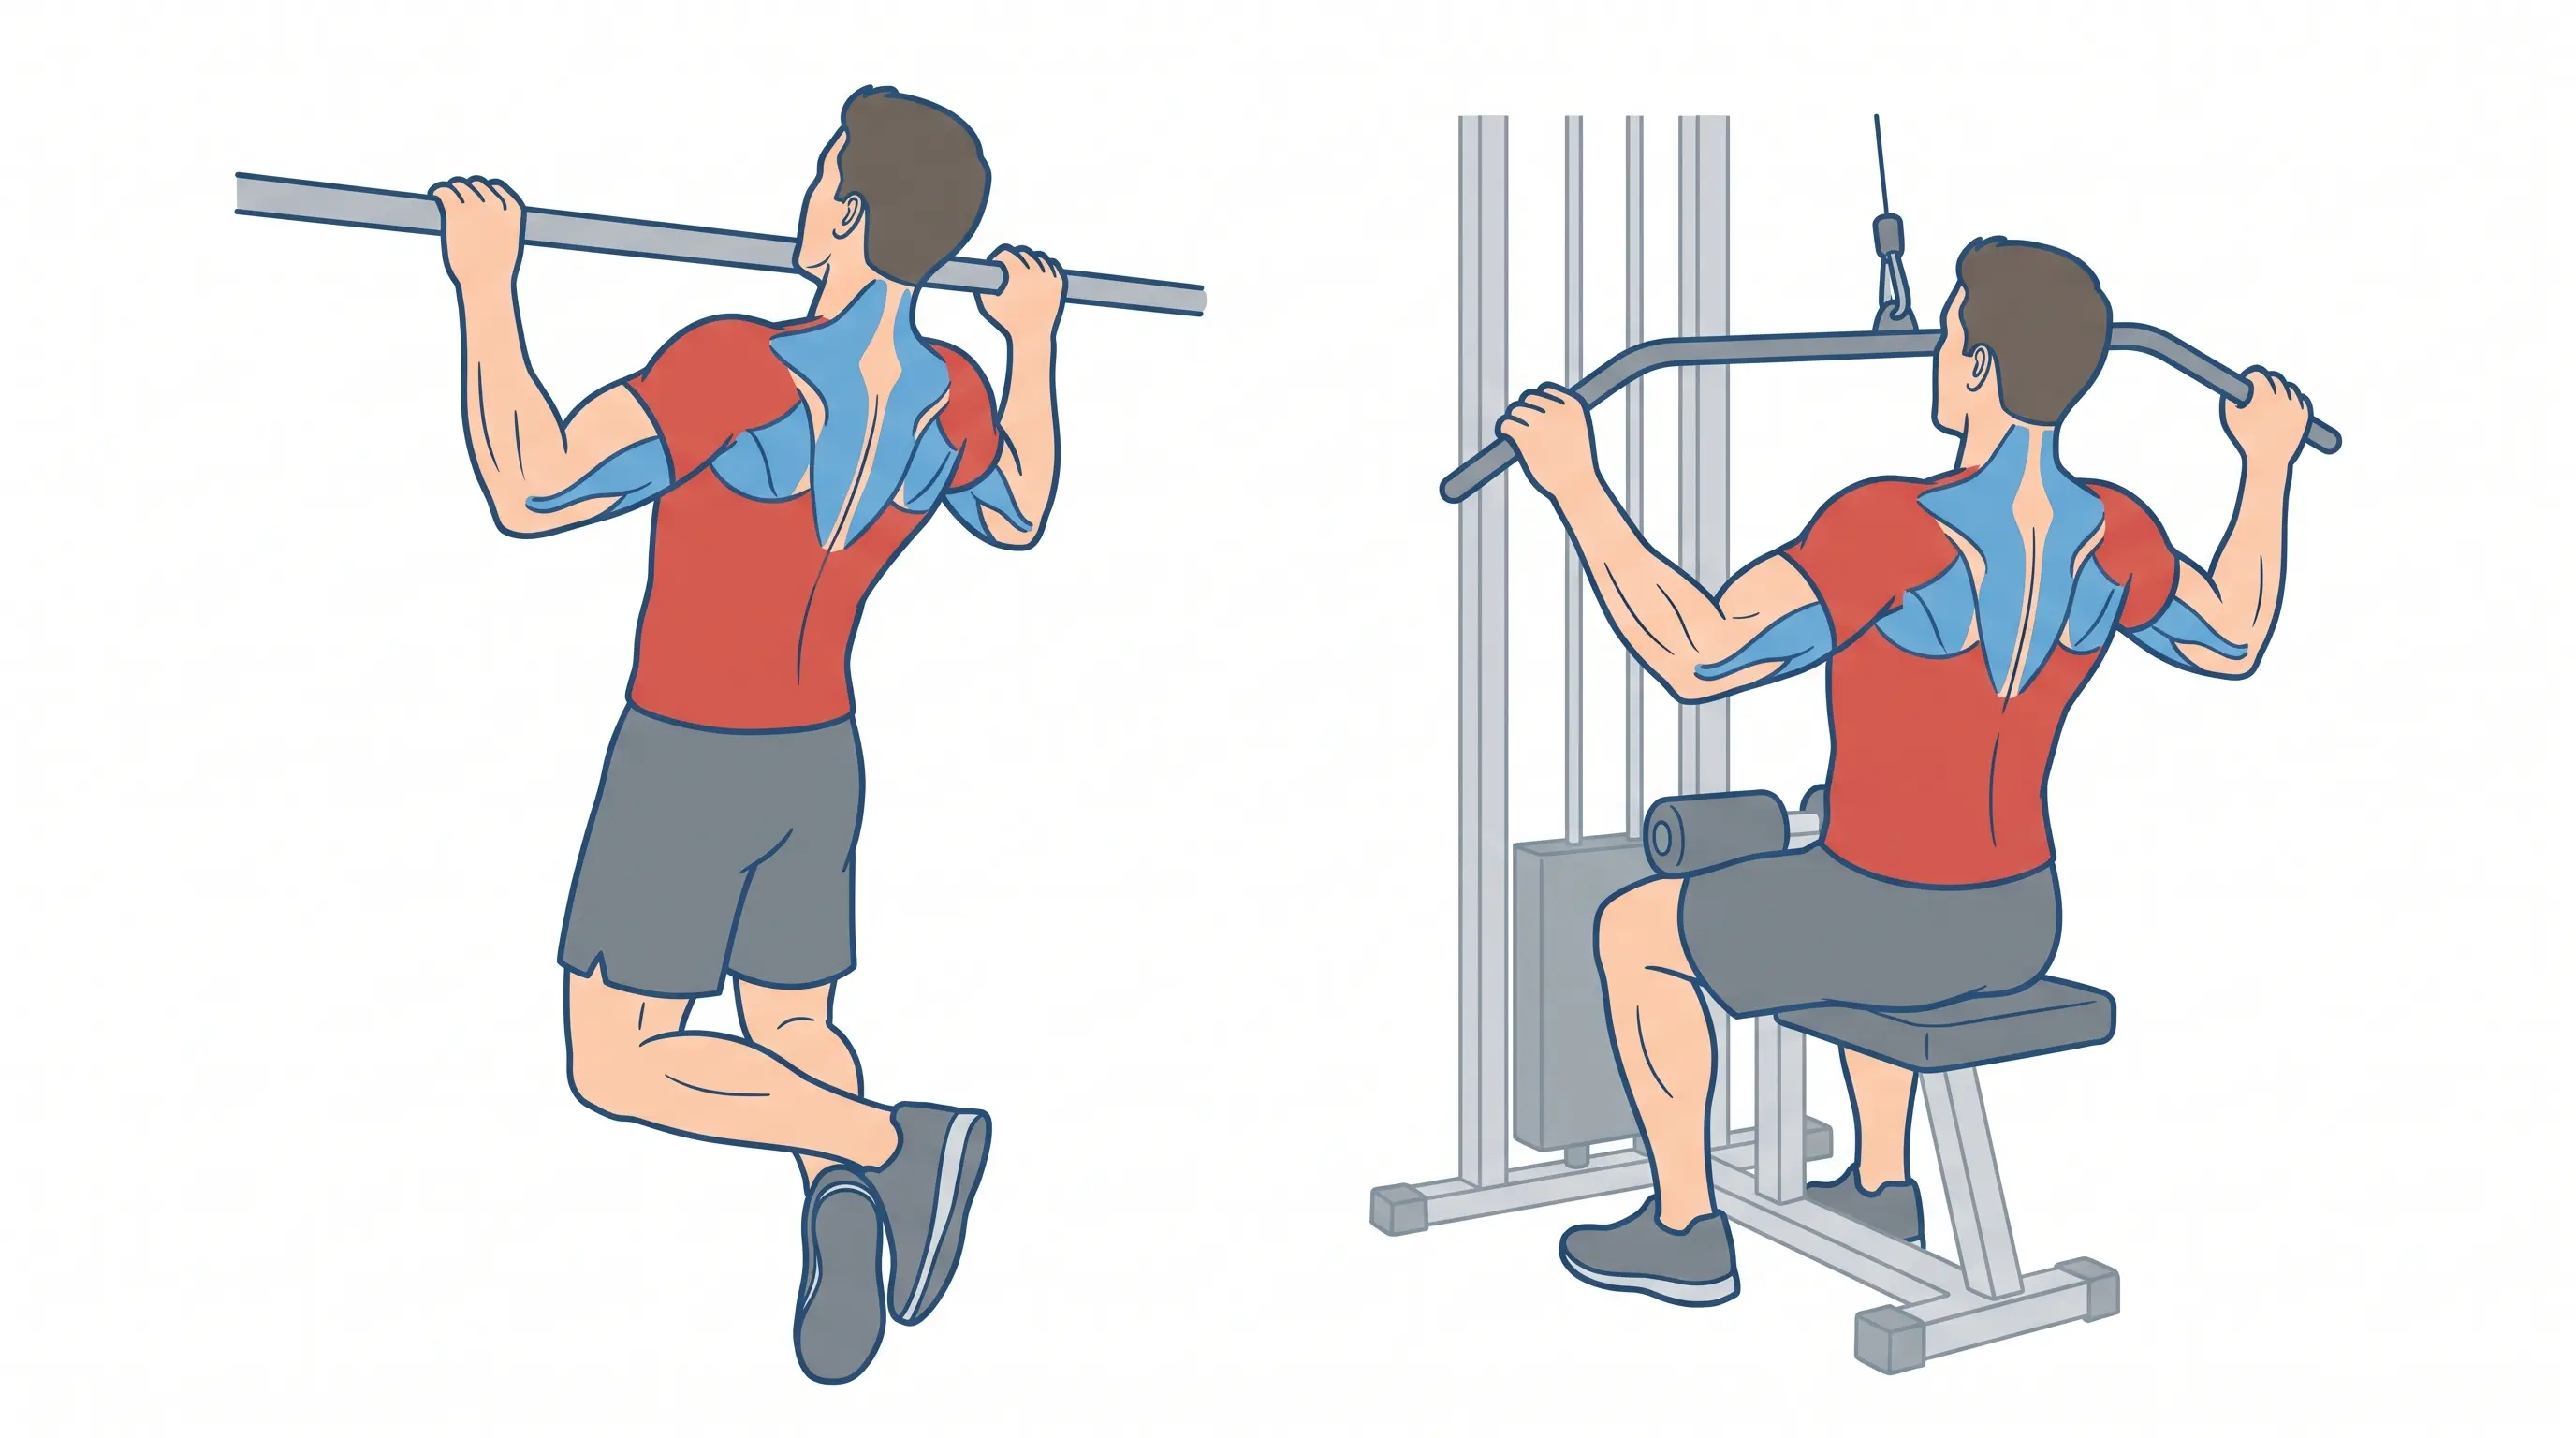
Pull-ups build the lats and upper back using body weight. The lat pulldown does the same job with a machine. This makes resistance easier to control while you learn the movement.
Both are vertical pulling exercises. Vertical pulls target the lats and build back width. They belong in every pull workout routine.
How to do it (lat pulldown):
- Grip the bar with hands wider than shoulder width.
- Sit with your thighs locked under the pad.
- Pull the bar down to your upper chest, leading with your elbows.
- Squeeze your shoulder blades together at the bottom.
- Let the bar rise back up with control.
Sets and reps: 3 sets of 8 to 10 reps.
Can’t do pull-ups yet? Use an assisted machine or loop a resistance band over the bar to reduce the load.
3. Barbell Row
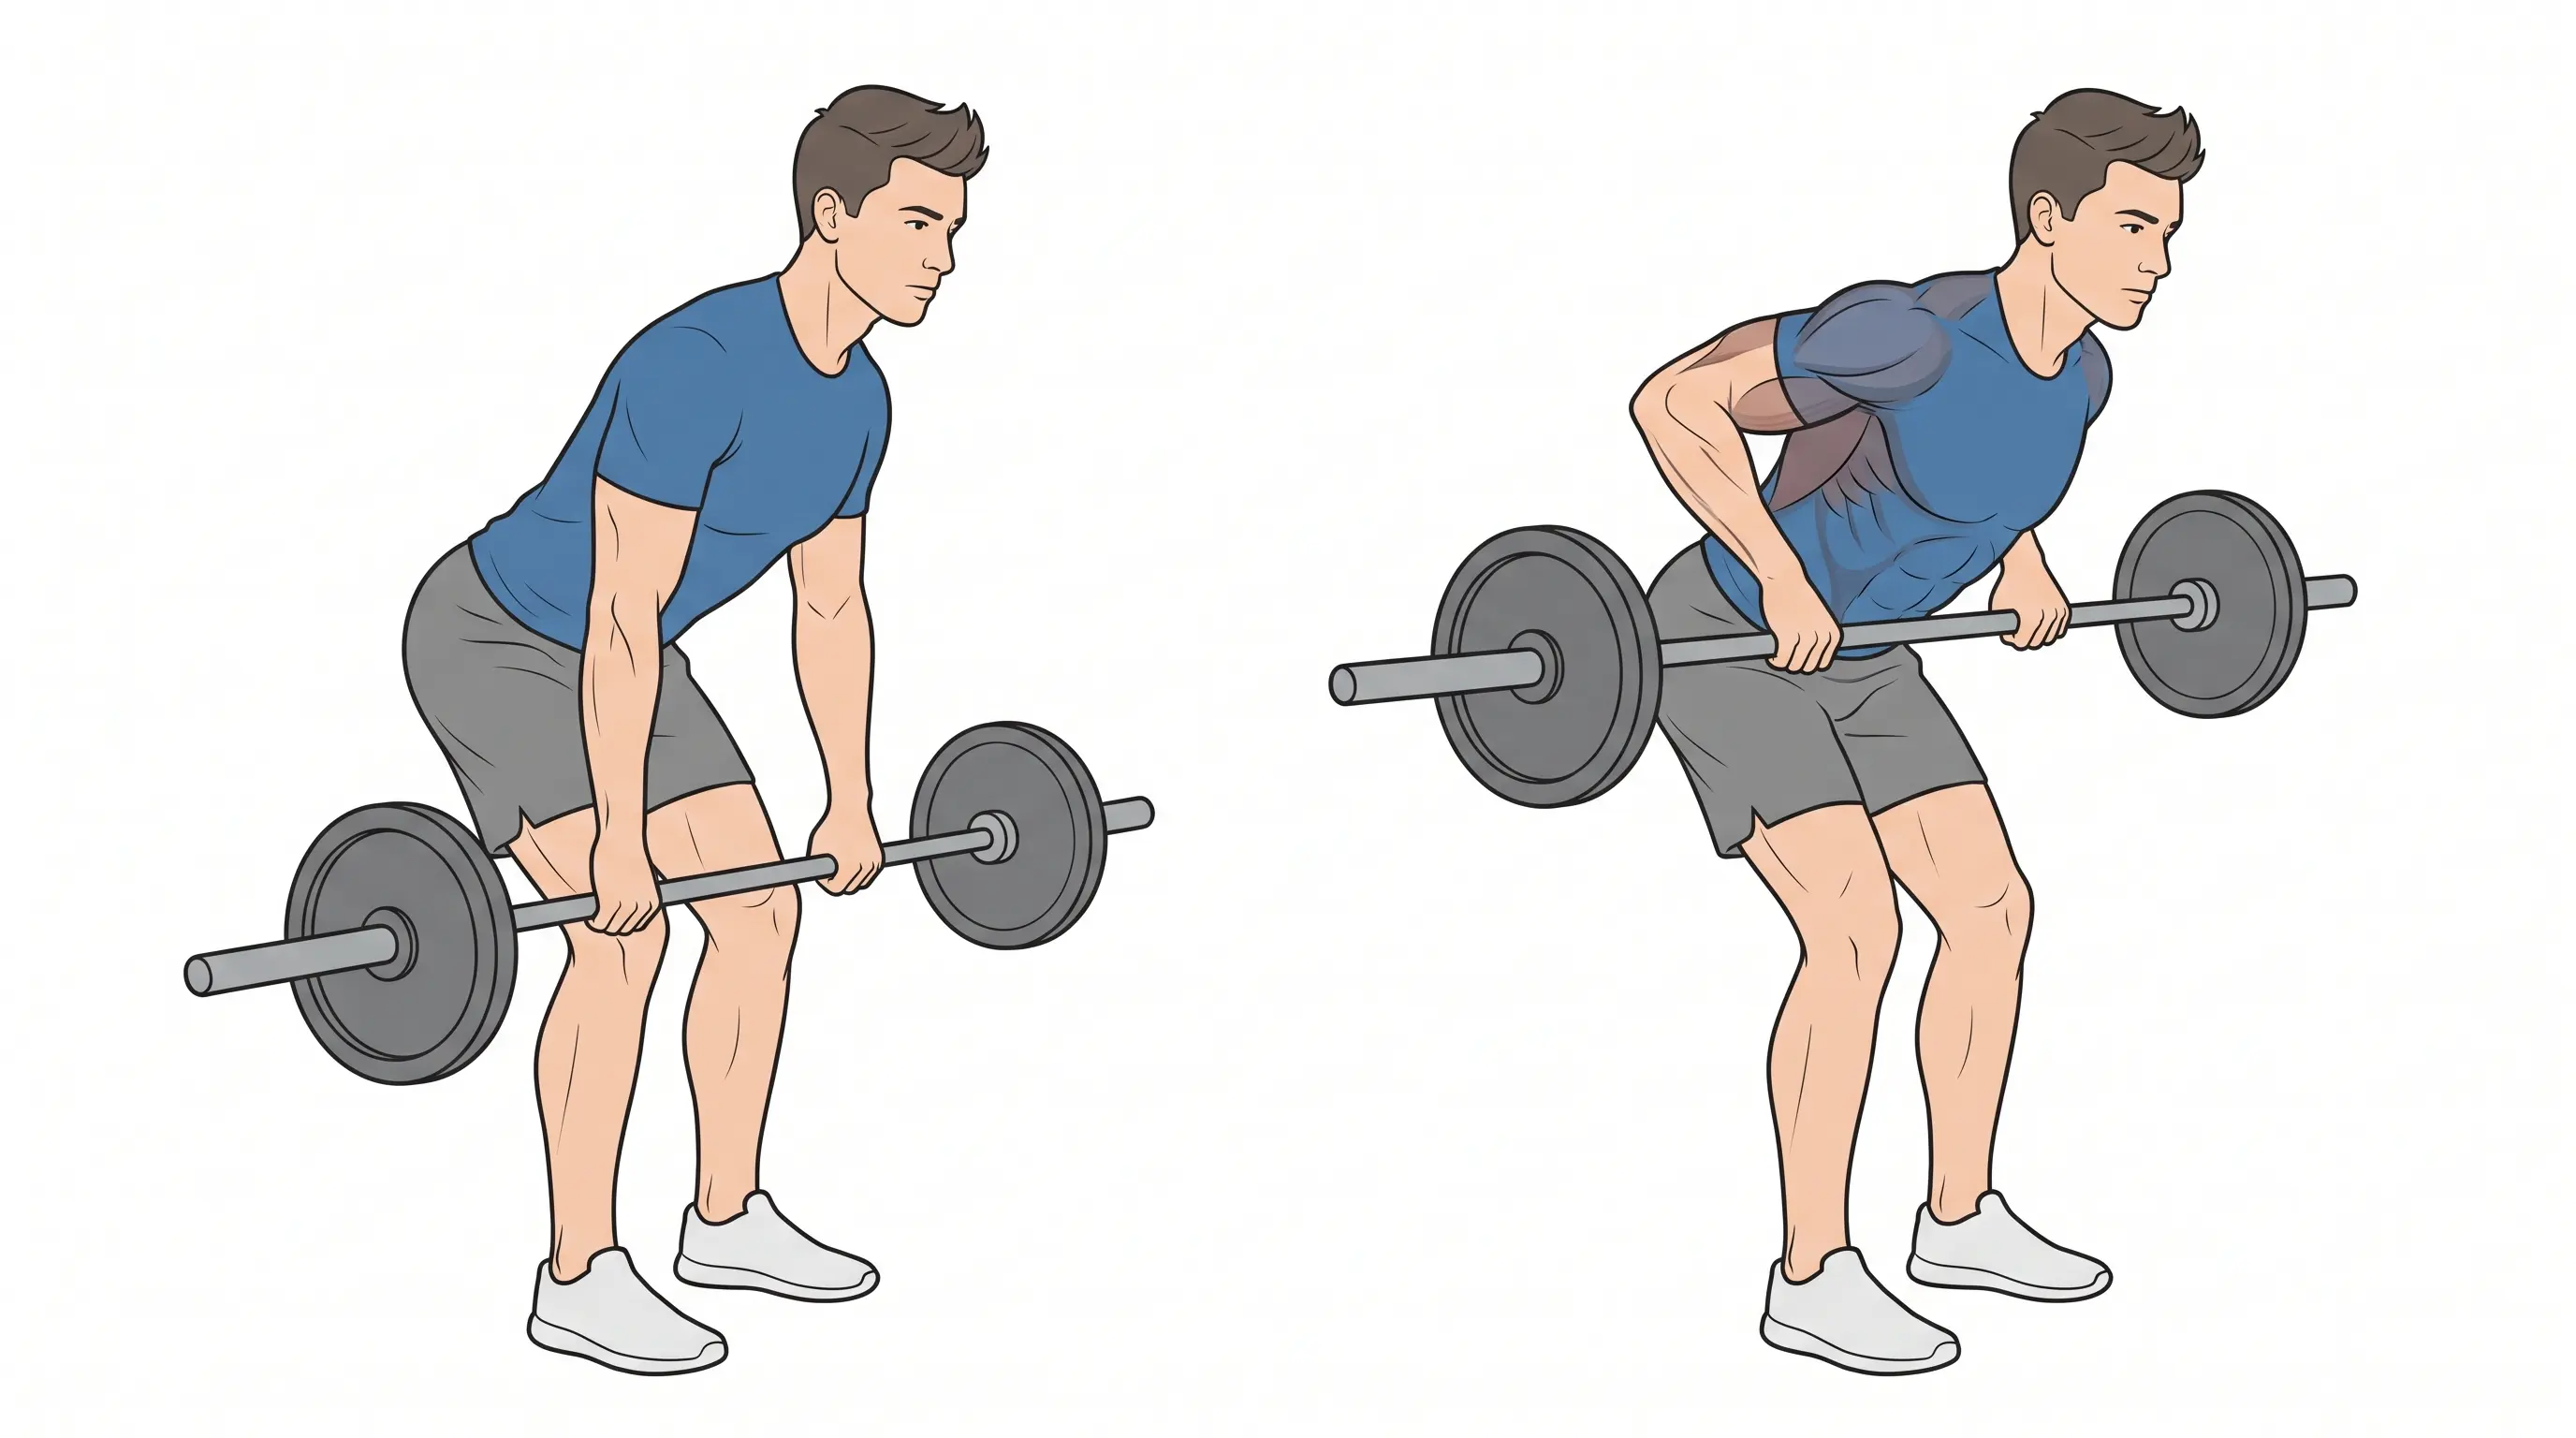
The barbell row builds thickness across your mid-back. It also works the traps and rear delts and balances out the muscles used in a bench press.
This is a horizontal pulling exercise. Horizontal pulls are what build that thick, 3D look across the upper back.
How to do it:
- Stand with feet shoulder-width apart and grip the bar overhand.
- Hinge forward with a flat back until your torso is near parallel to the floor.
- Pull the bar toward your belly button.
- Squeeze your shoulder blades at the top.
- Lower with control and repeat.
Sets and reps: 3 sets of 8 reps.
Common mistake: Yanking the bar with momentum shifts the work to your lower back instead of your lats. Keep your knees soft and control every rep.
4. Single-Arm Dumbbell Row
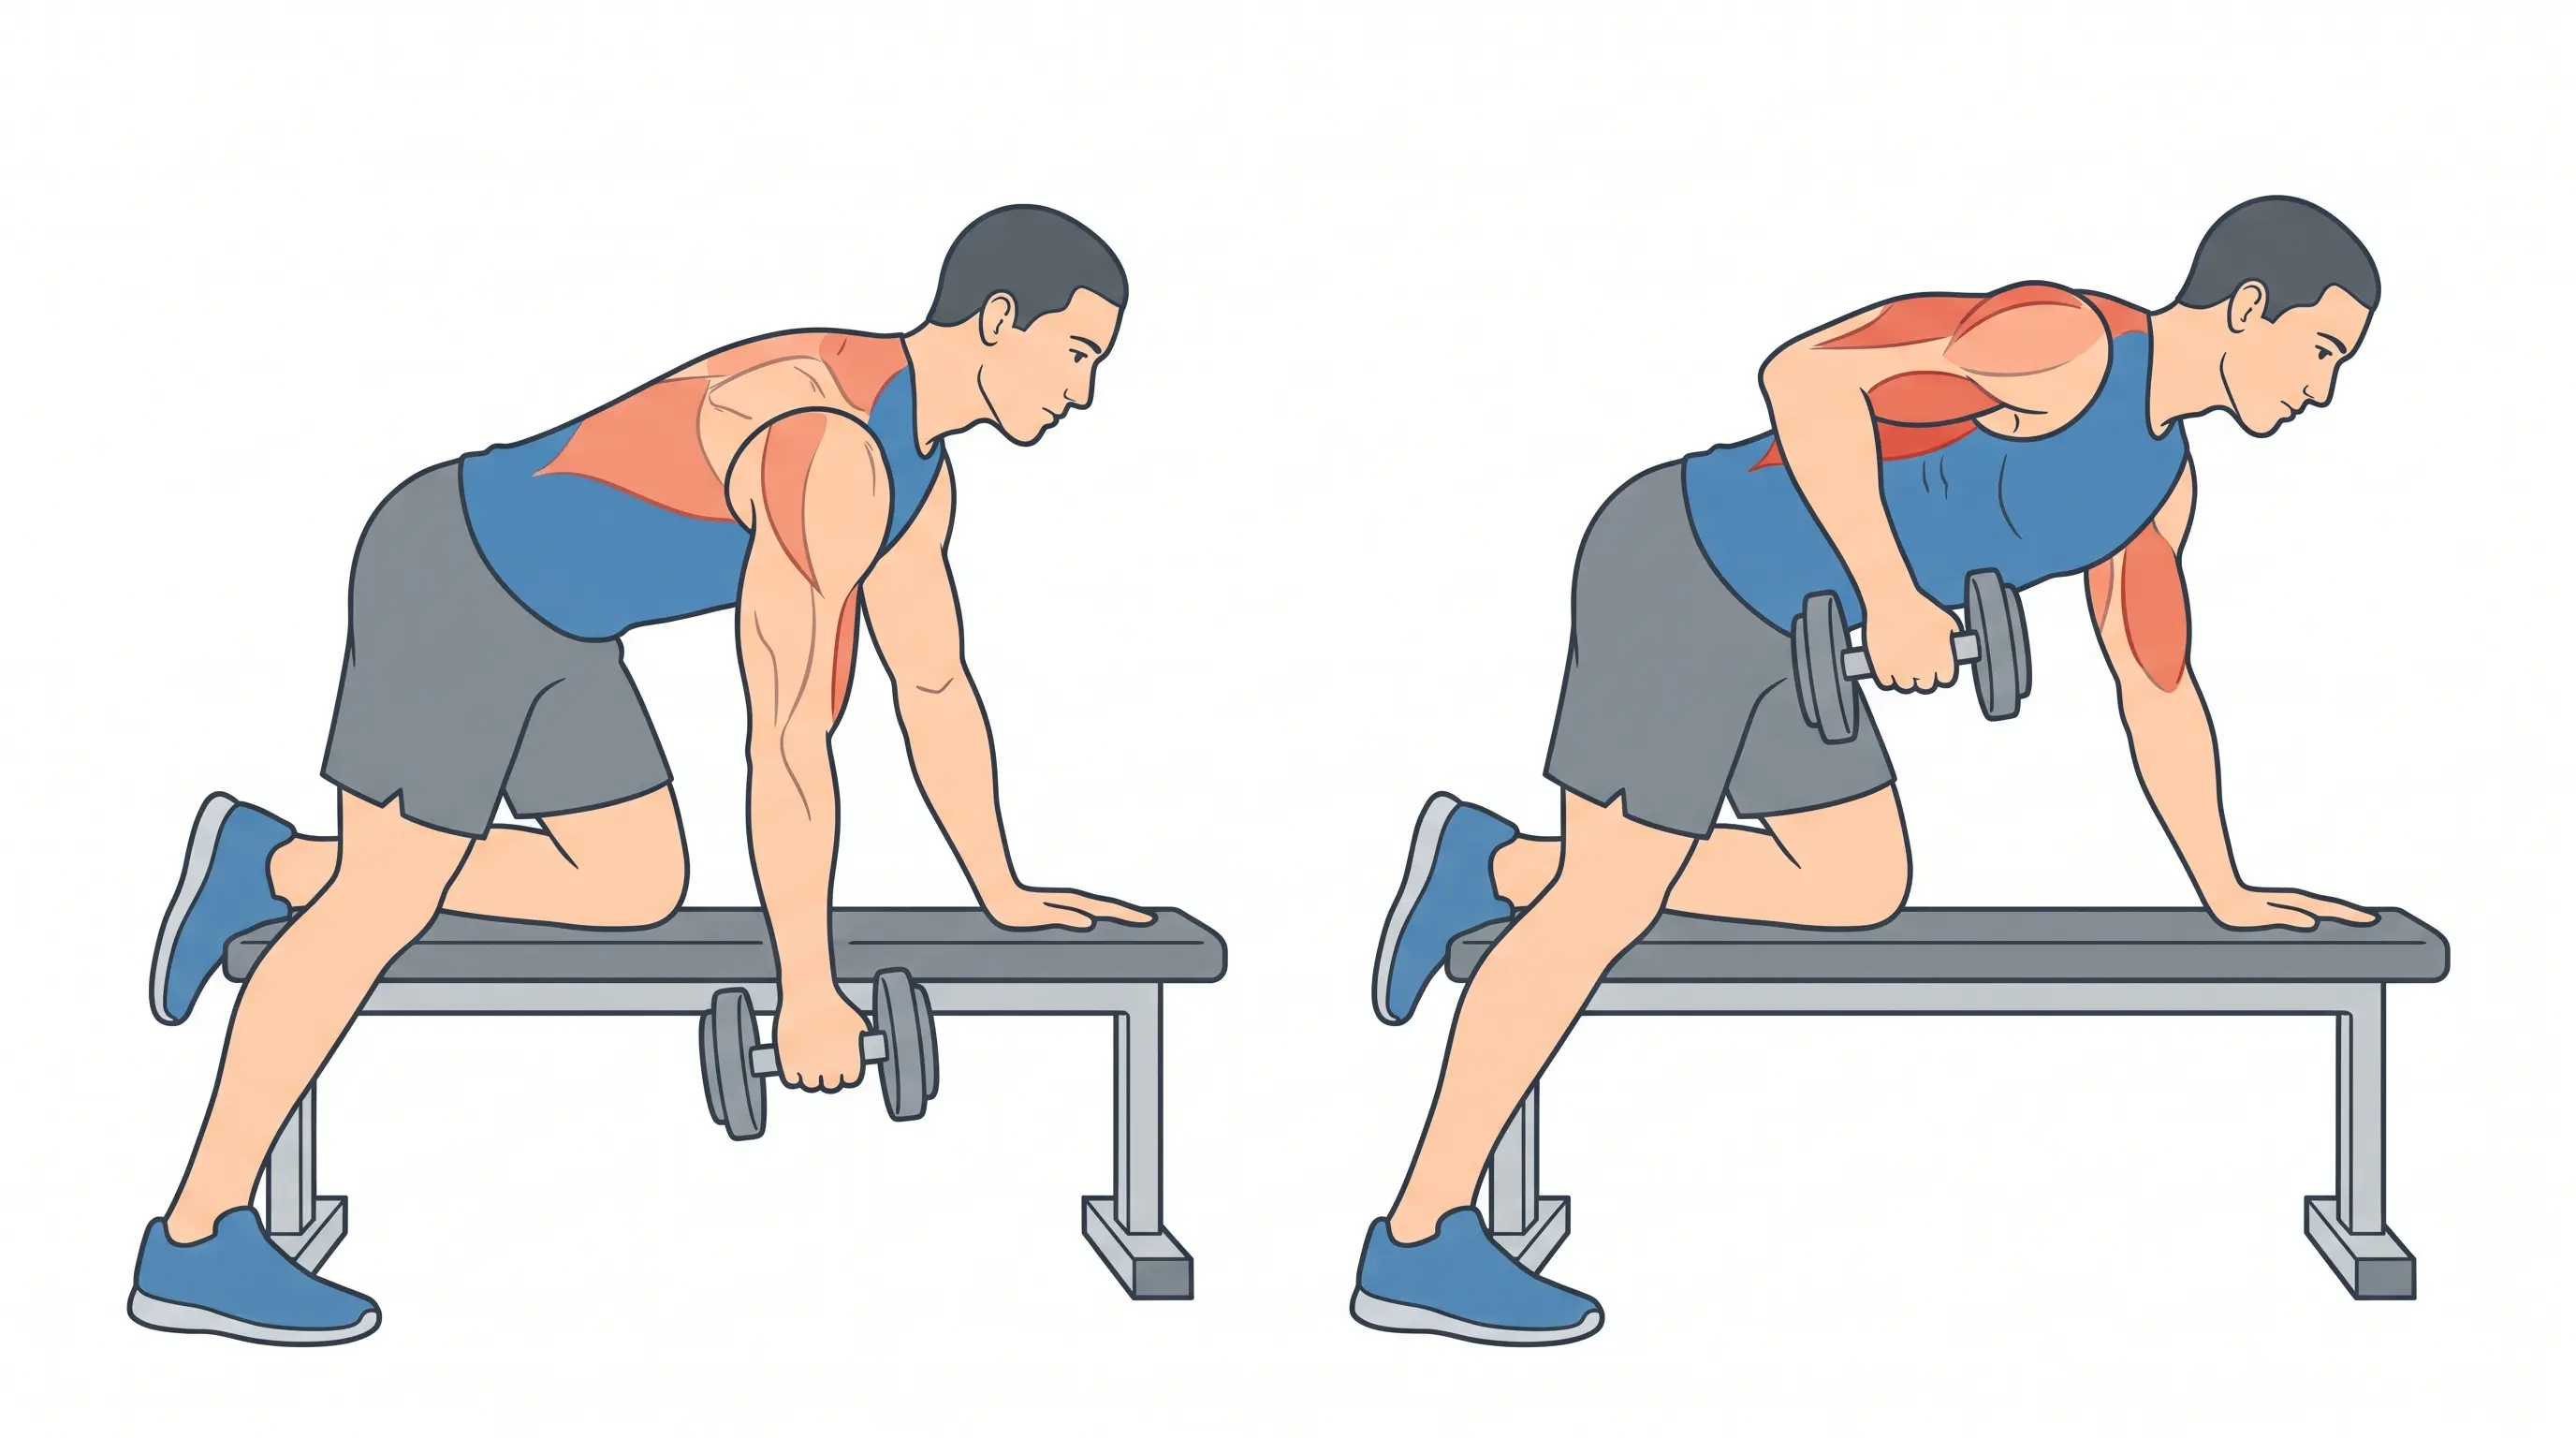
Training one side at a time closes strength gaps between your left and right back muscles. It also allows a longer range of motion than a barbell.
How to do it:
- Place one knee and hand on a bench.
- Let the working arm hang straight down, holding a dumbbell.
- Pull your elbow up and back, keeping it close to your body.
- Lower with control, finish your reps, then switch sides.
Sets and reps: 3 sets of 10 reps per side.
No bench? Hinge at the hips while standing and row from there.
5. Seated Cable Row
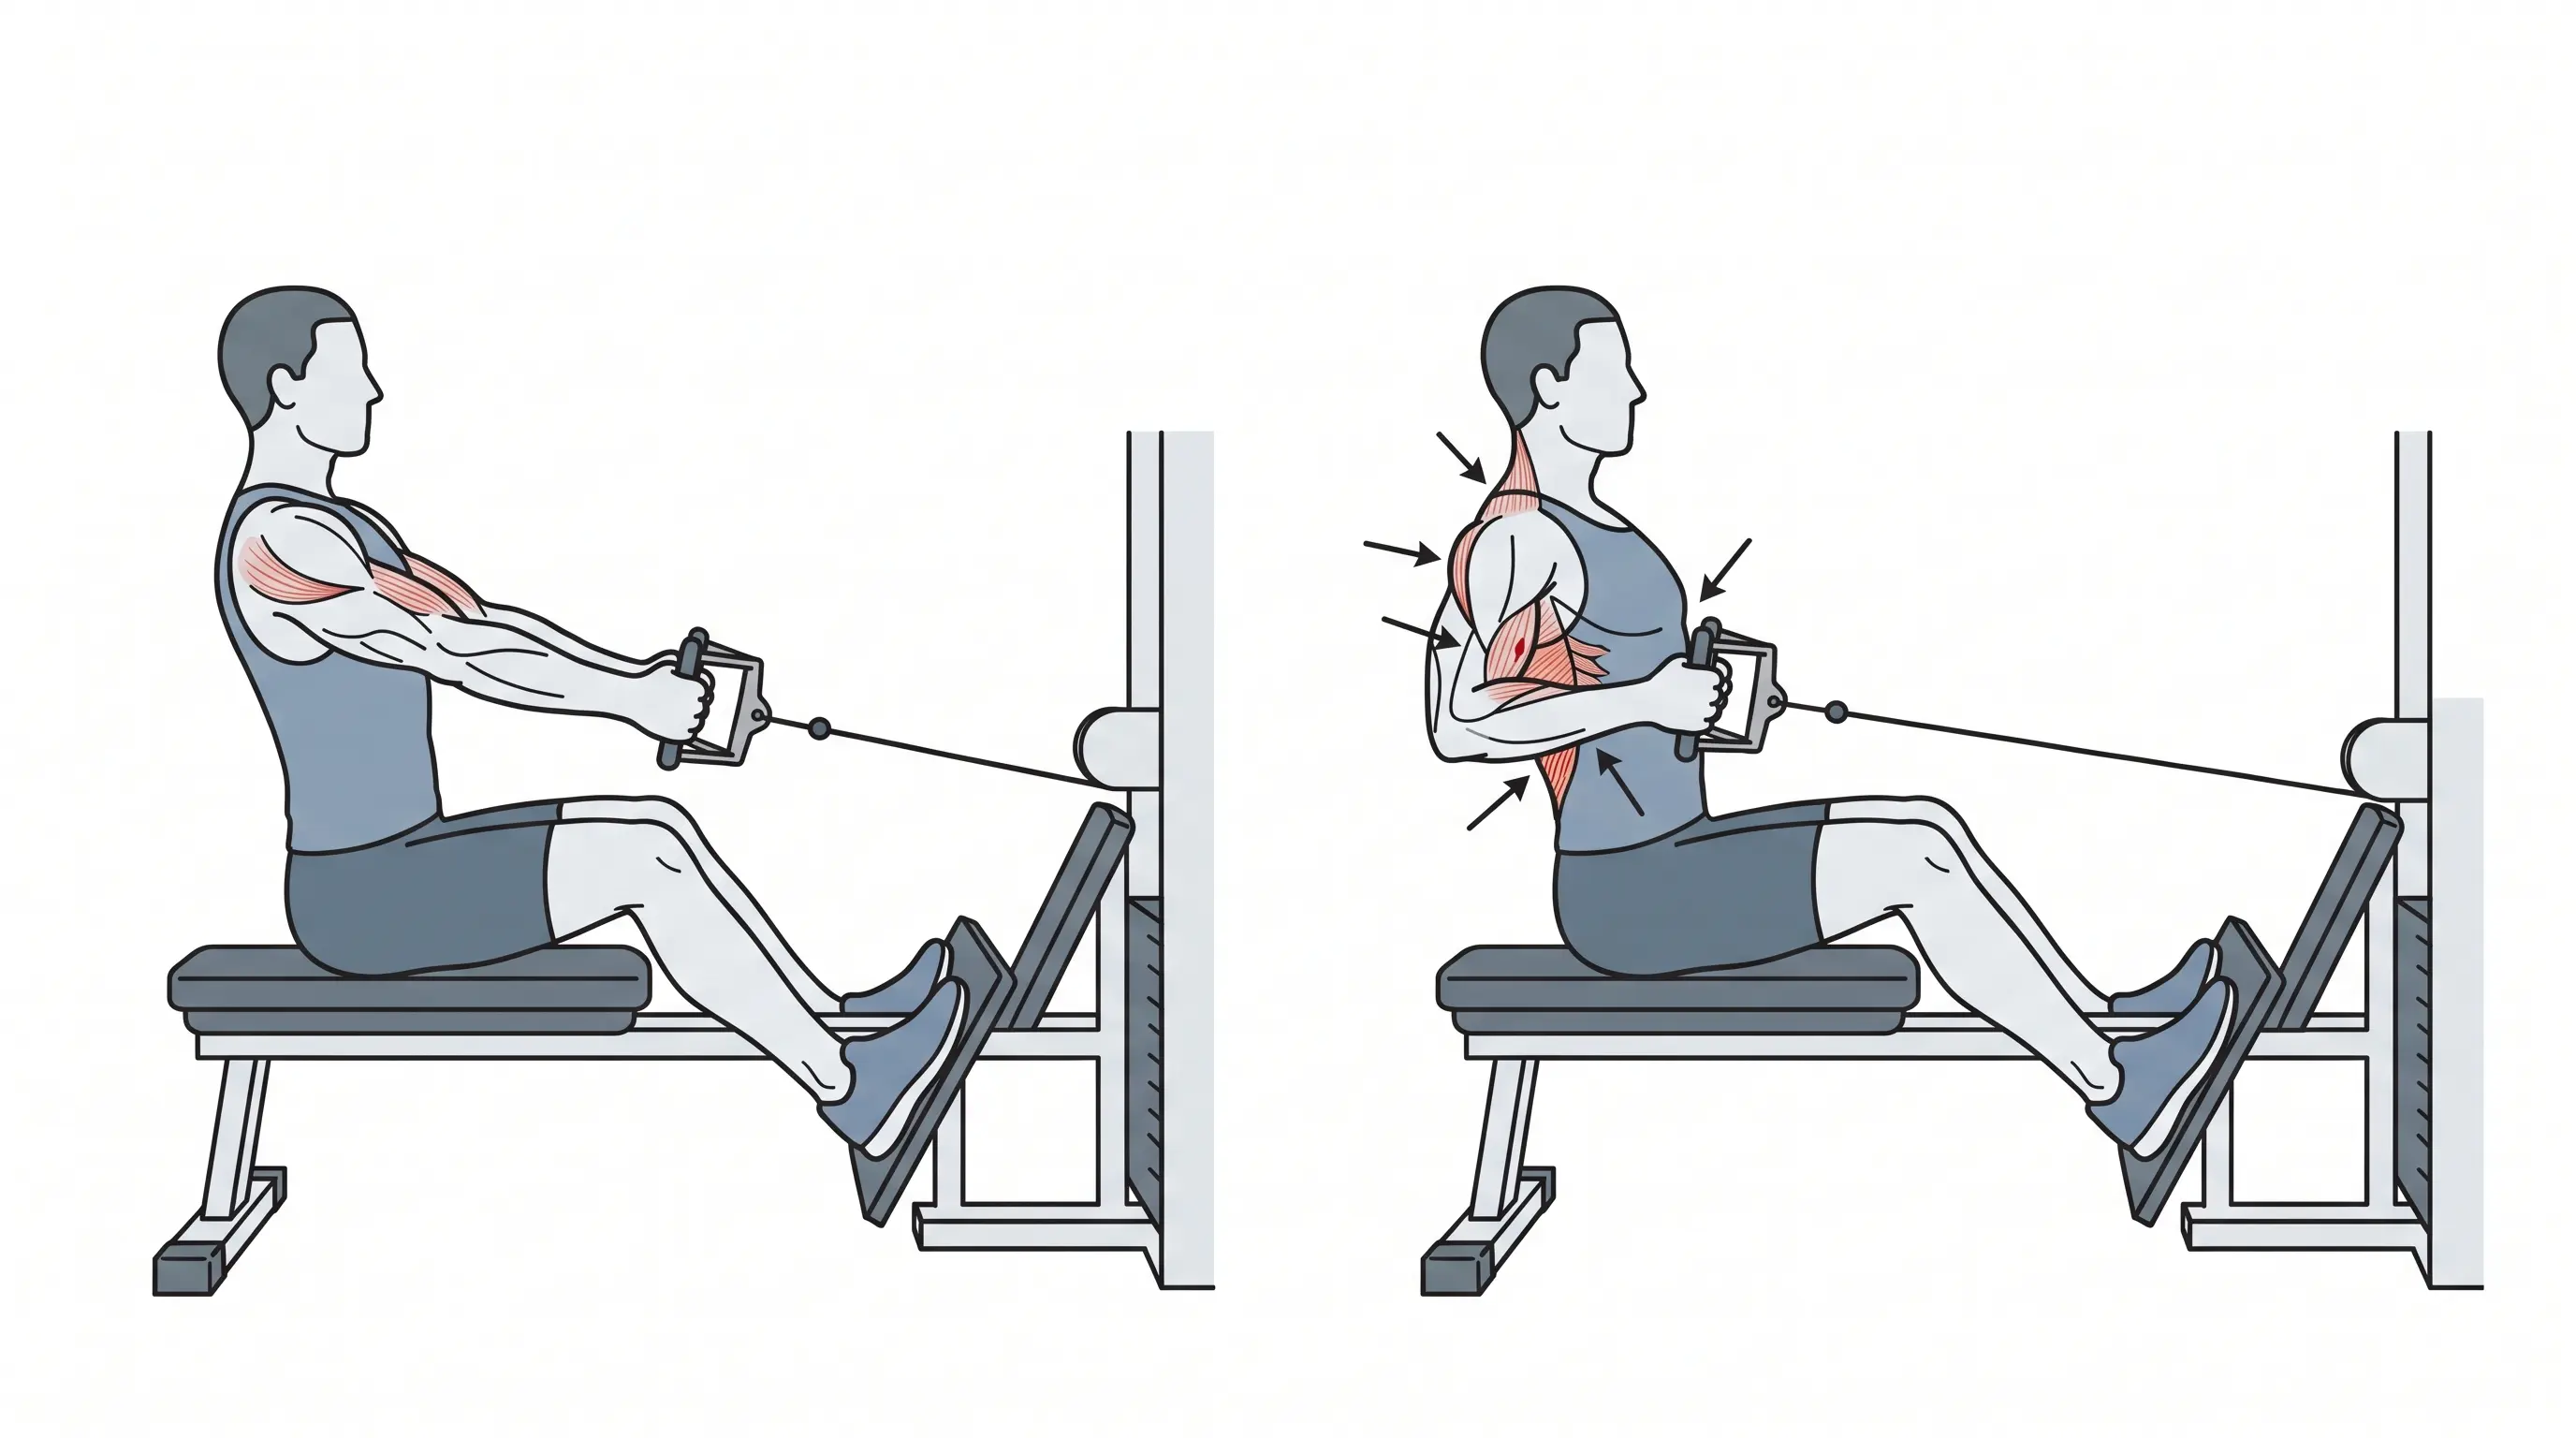
A cable row keeps constant tension on your back throughout the full range of motion. Free weights tend to lose tension at certain points in the movement. Cables do not. This makes the seated cable row a useful addition to any pull workout routine.
It is also easier on the lower back than bent-over rows. This makes it a good option for anyone managing back strain.
How to do it:
- Sit with feet braced on the platform, knees slightly bent.
- Grip the handle and sit tall.
- Pull the handle to your torso, leaning back slightly.
- Squeeze your shoulder blades together at the end of the pull.
- Return slowly to the starting position.
Sets and reps: 3 sets of 10 to 12 reps.
6. Face Pull
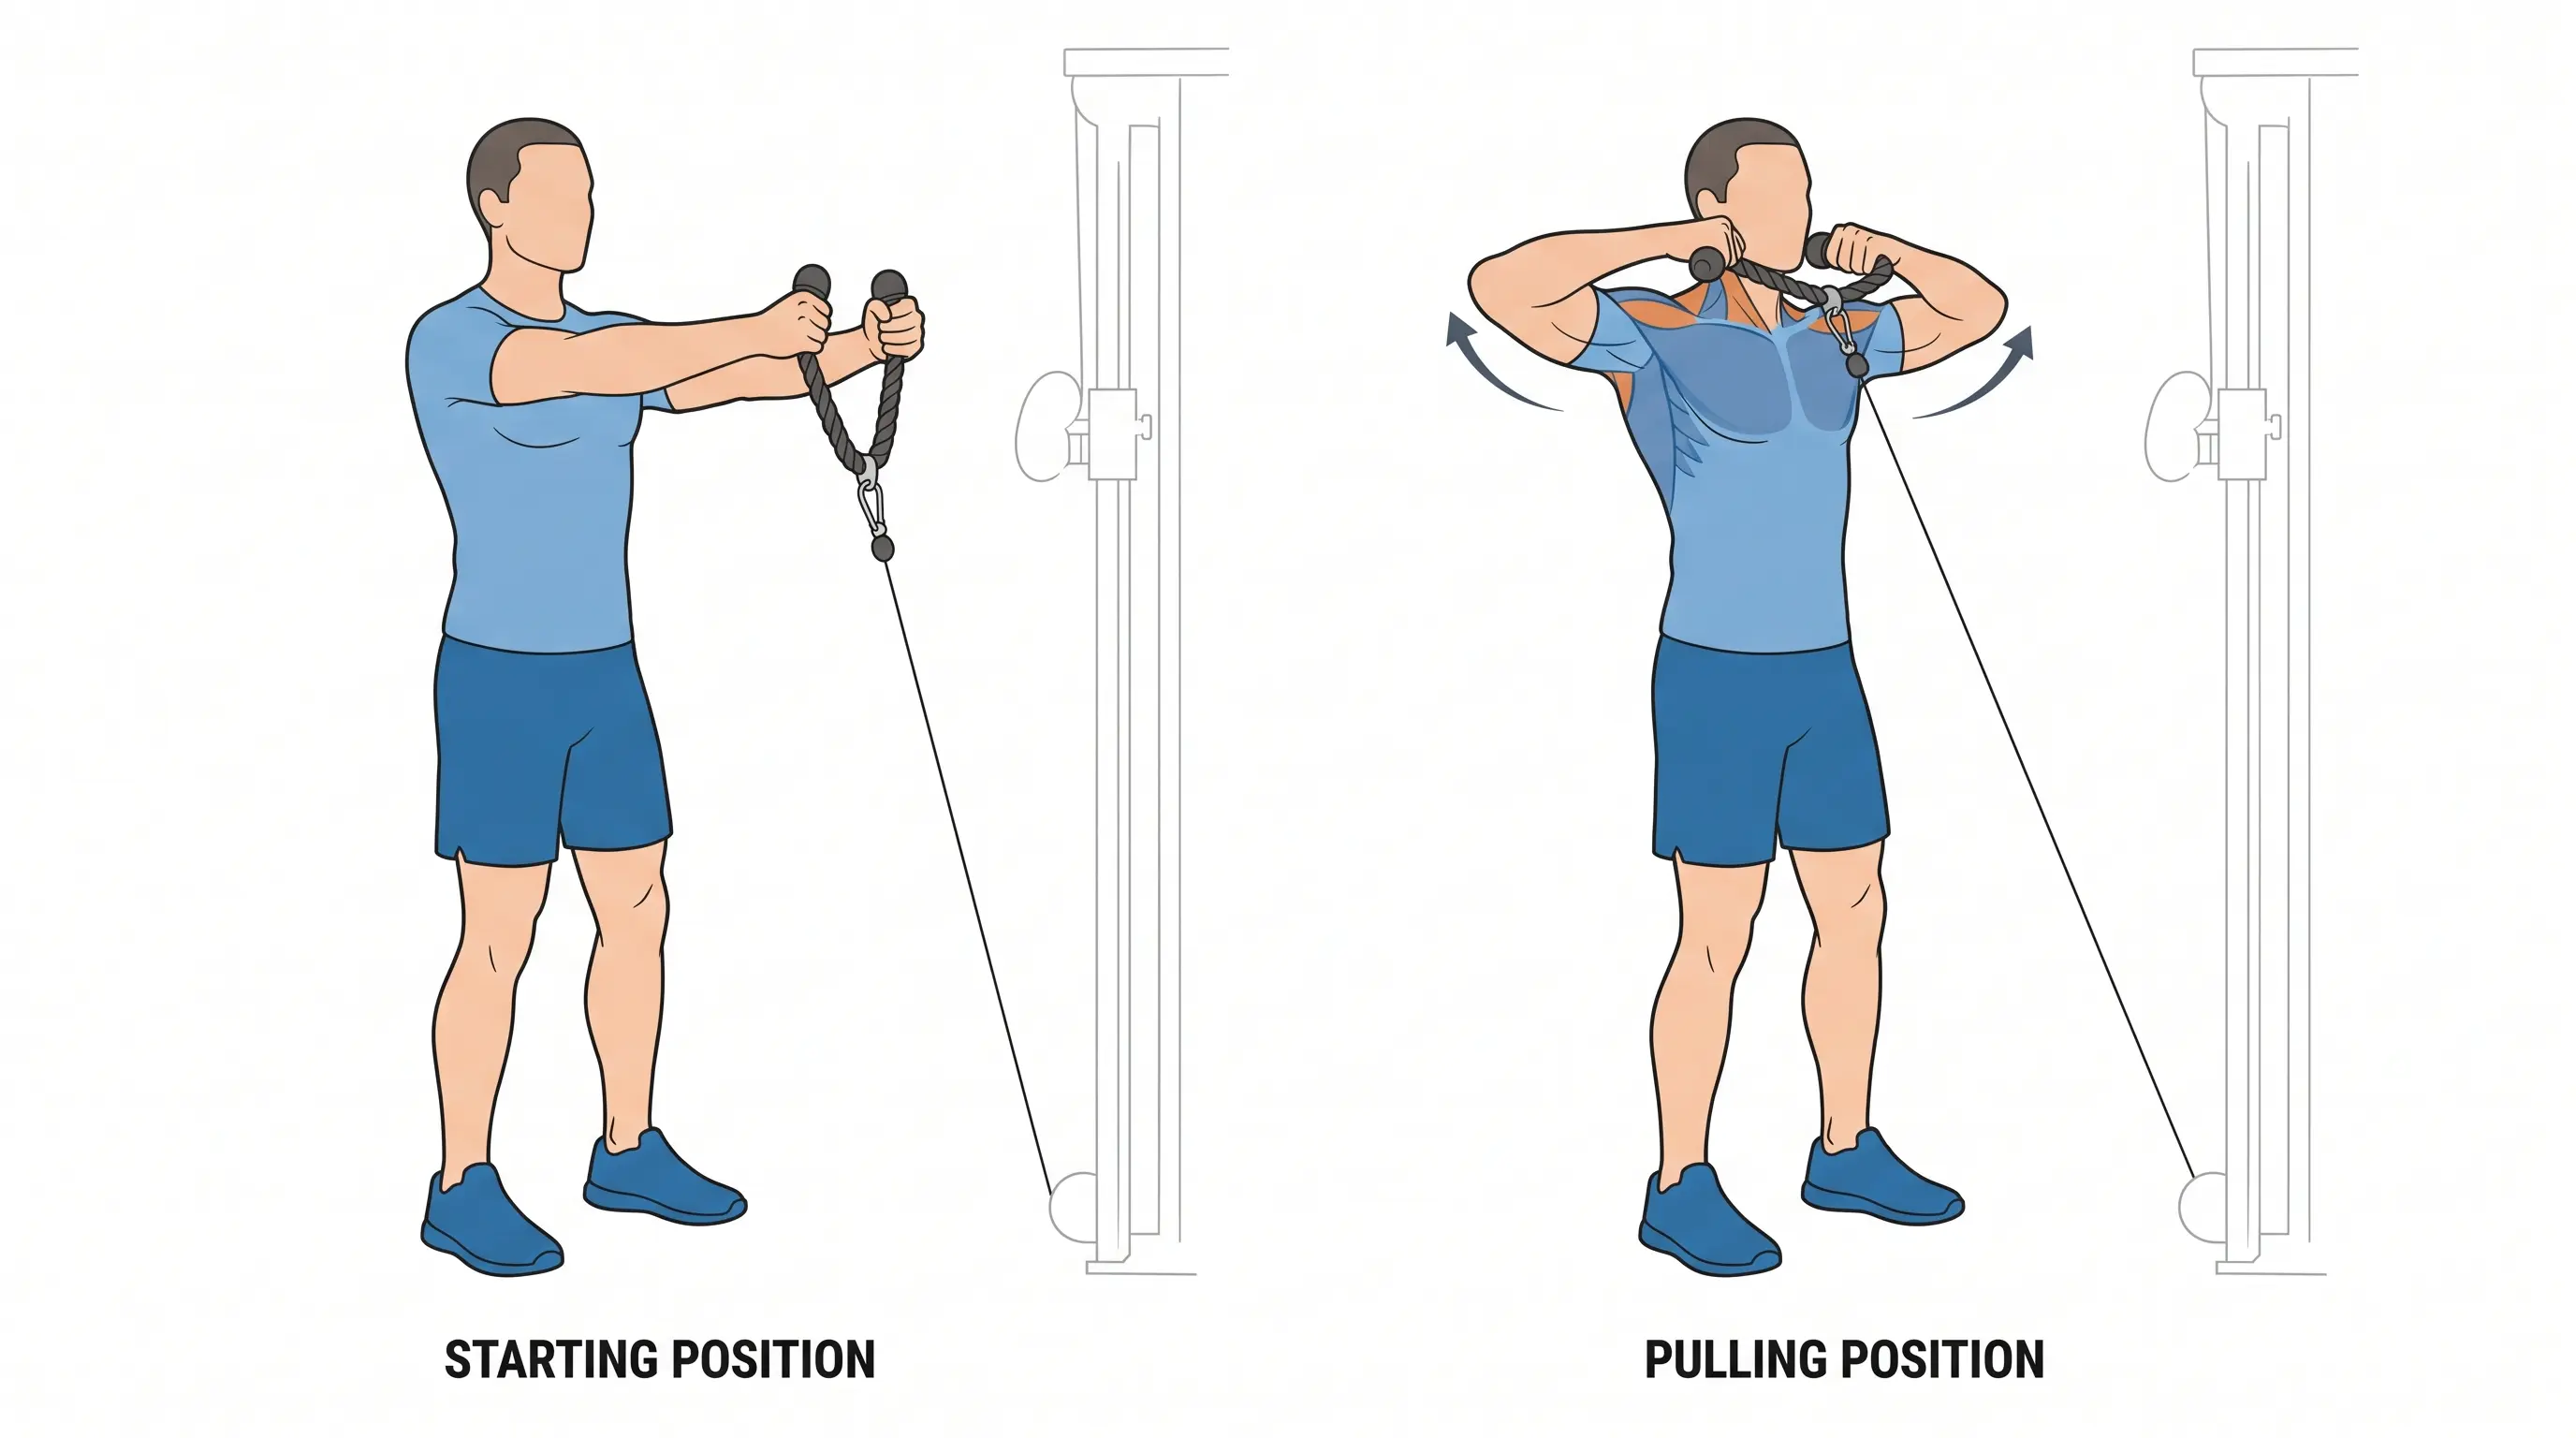
Face pulls train the rear delts and rotator cuff, two areas that get ignored on most pull days. Weak rear delts lead to rounded shoulders over time. A few sets of face pulls corrects this and protects your shoulder joints on pressing movements.
How to do it:
- Set a rope attachment at chest height on a cable machine.
- Grip the rope with both hands and step back.
- Pull the rope toward your face with elbows high.
- Pause briefly, then return with control.
Sets and reps: 2 to 3 sets of 12 to 15 reps.
Use a light weight here. Form matters more than load on this exercise.
7. Barbell or Dumbbell Curl
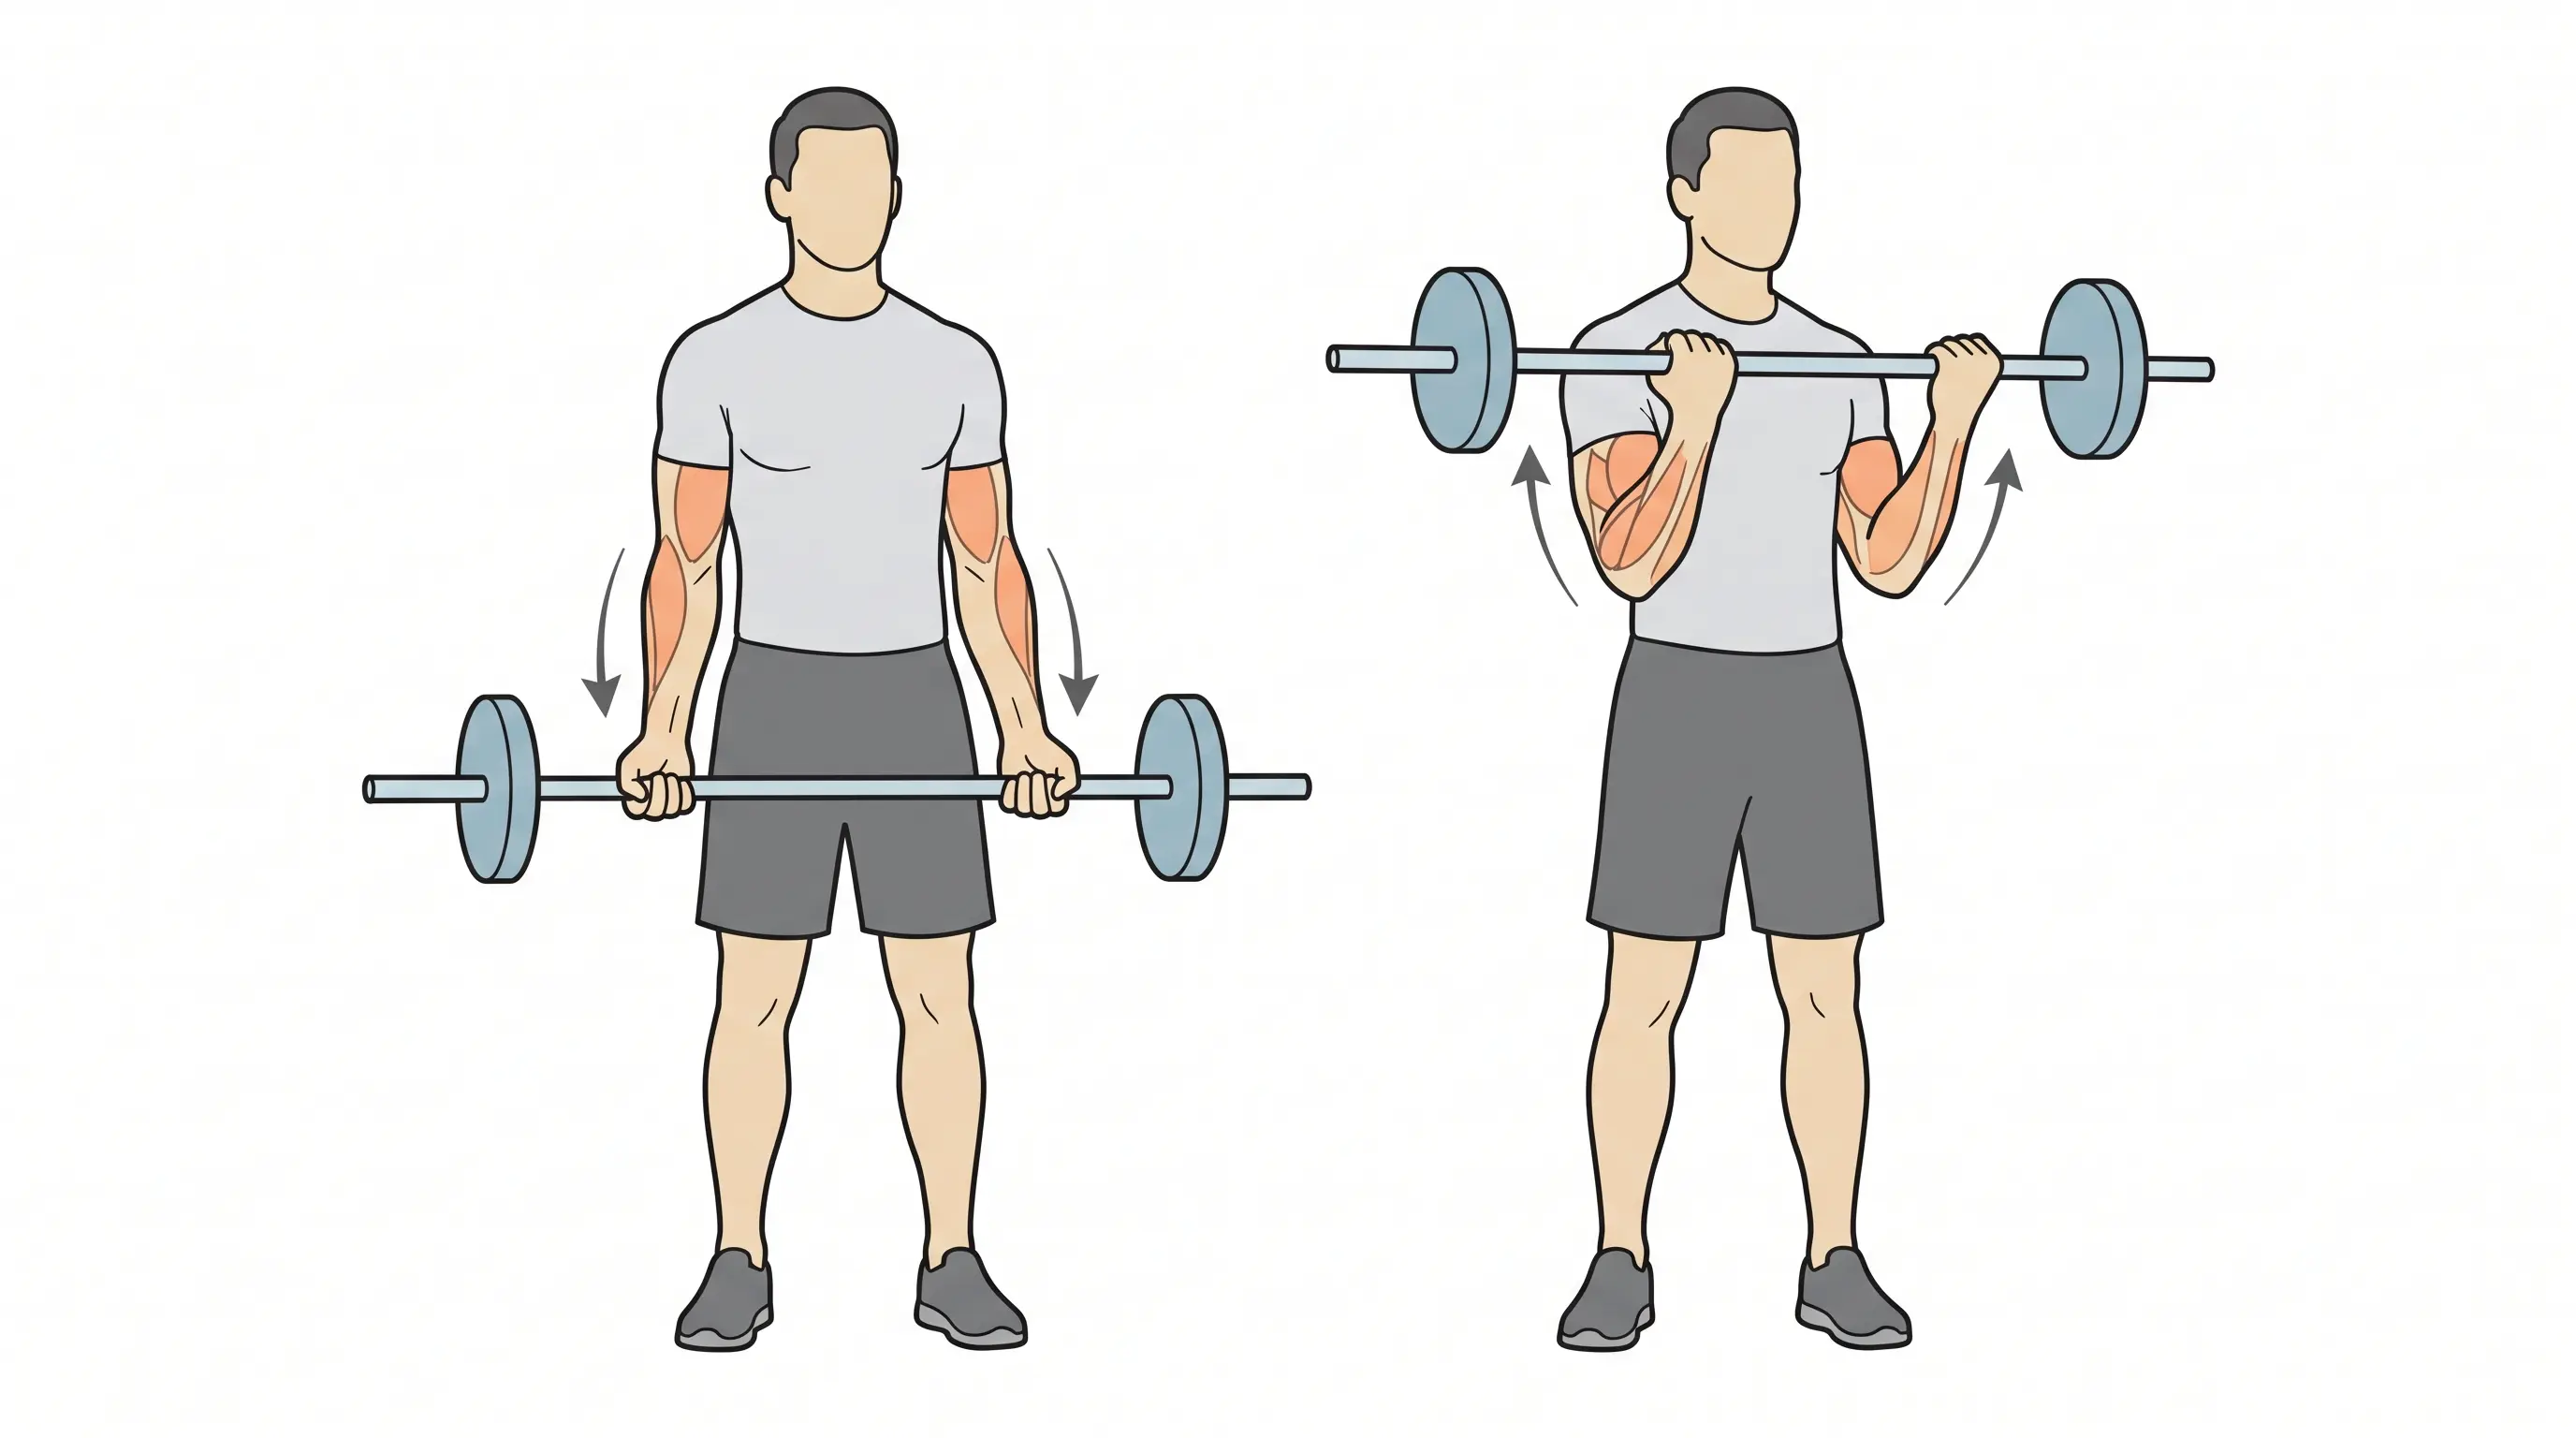
Curls isolate the biceps directly. They add size and strength to the front of your upper arm. By this point in the session, your back has been trained through several compound lifts. Curls finish the bicep work that rows and pulldowns started.
How to do it:
- Grip the bar or dumbbells with palms facing forward.
- Keep your elbows tucked at your sides.
- Curl the weight up by bending your elbows.
- Lower slowly and repeat.
Sets and reps: 2 to 3 sets of 10 reps.
8. Hammer Curl
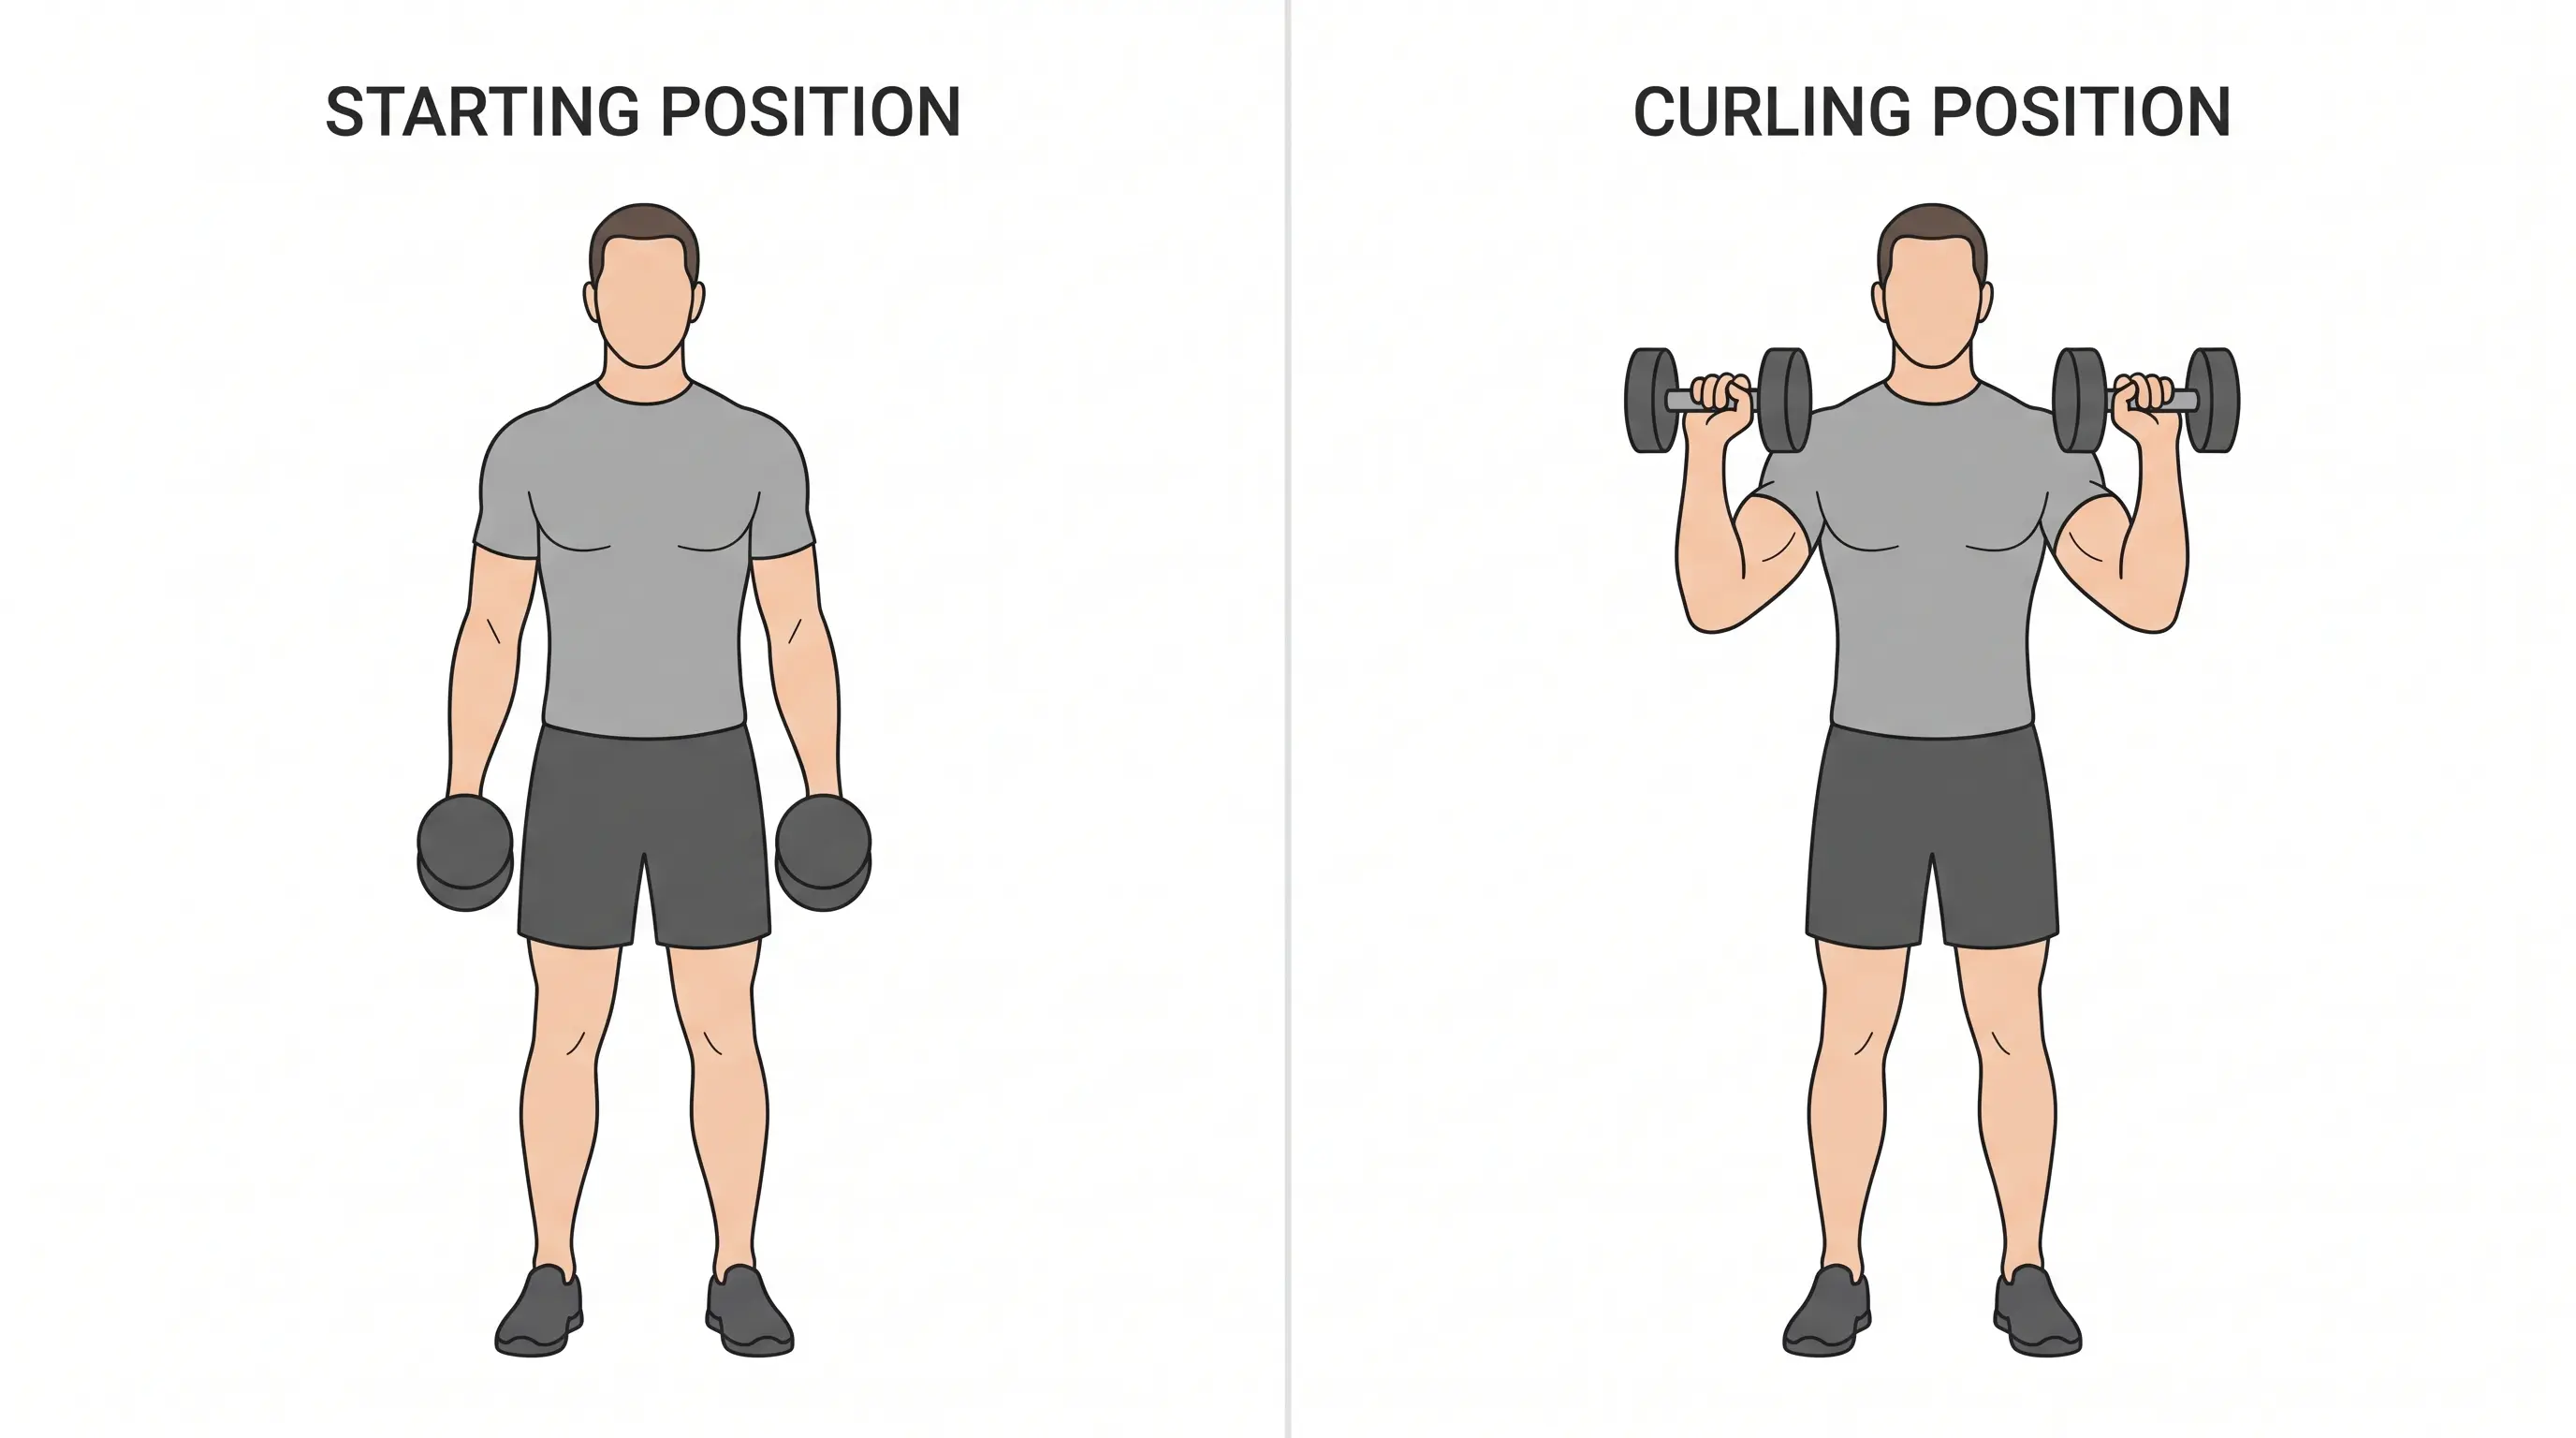
Hammer curls train the brachialis, a muscle beneath the biceps that adds width to your upper arm. The neutral grip also puts less strain on your wrists than a standard curl.
How to do it:
- Hold a dumbbell in each hand, palms facing your body.
- Curl one arm up while keeping your elbow pinned to your side.
- Lower with control and repeat on the other arm.
Sets and reps: 2 to 3 sets of 10 to 12 reps per side.
How Many Sets, Reps, and Rest Periods Should You Use?
Compound lifts and isolation moves need different rep ranges and rest windows. The table below shows the right targets for each exercise type. Use it to get the most out of every set.
|
Exercise Type |
Rep Range |
Rest Between Sets |
|---|---|---|
|
Compound (deadlift, row, pulldown) |
5 to 10 reps |
90 to 180 seconds |
|
Isolation (curls, face pulls) |
10 to 15 reps |
45 to 75 seconds |
Heavy compound lifts need longer rest so you can perform each set at full effort. Isolation work uses lighter loads, so shorter rest keeps the session moving without hurting your results.
Common Pull Day Mistakes to Avoid
Even a well-planned pull day can fall short if a few habits go unchecked. Here are the most common ones and how to fix them.
- Using momentum instead of muscle: Swinging the weight on rows or curls shifts tension away from your back and arms. Slow the movement down and let the target muscle do the work.
- Skipping rear delt training: Rear delts get ignored on most pull days. Weak ones lead to rounded shoulders over time. A few sets of face pulls addresses this before it becomes a problem.
- Too many curls, not enough back work: Curls feel satisfying, but a pull day builds your back first. Keep two or three back exercises before your curls in the session order.
- Skipping the warm-up: Cold shoulders and a cold lower back raise your injury risk on heavy pulls. This matters most on deadlifts and barbell rows.
- Only pulling vertically: Defaulting only to pulldowns and pull-ups leaves your mid-back underdeveloped. A balanced pull session includes both vertical and horizontal pulling movements.
Pull Day Progressions by Experience Level
Your training experience changes how many exercises you need and how hard you should push each set. Use this table as a starting point and adjust as your body adapts.
|
Level |
What to Focus On |
Sets and Reps |
|---|---|---|
|
Beginner |
Master form on lat pulldown, cable row, and curls |
3 sets of 10 to 12 reps |
|
Intermediate |
Add pull-ups and barbell rows; increase load progressively |
3 to 4 sets of 8 to 10 reps |
|
Advanced |
Add deadlifts and weighted pull-ups; train closer to failure |
4 sets of 6 to 8 reps |
A beginner does not need eight exercises in one session. Three or four done well beat eight done poorly. Add movements as your form and recovery improve.
For help building your full training week, see this five-day workout split breakdown.
Get the Most Out of Your Pull Day Exercises
A good pull day builds a stronger back, bigger arms, and healthier shoulders. Focus on quality exercises, proper form, and steady progression instead of simply adding more volume.
Stay consistent with your training, recover well, and your pull workouts will help improve both strength and physique.
Over time, these small improvements add up to better performance and a more balanced upper body.
Frequently Asked Questions
How many exercises should I do on pull day?
Most lifters do five to eight exercises on pull day. Beginners can start with three to four. Build from there as form improves and the body adapts.
What is the 3-3-3 rule in working out?
The 3-3-3 rule typically refers to doing 3 exercises, 3 sets each, across 3 different rep ranges. The exact definition varies by trainer, so it is not a universal standard.
Is it okay to mix push and pull days?
Yes. Combining push and pull in one session works well for upper-body or full-body routines. It fits a shorter training week well when your recovery allows for it.
What muscles can you train every day?
Abs, calves, and forearms recover quickly and handle frequent training well. Larger muscles like the back, chest, and legs need more recovery time between intense sessions.
How often should I do a pull day?
Training pull muscles once or twice a week works well for most people. Training them twice per week tends to produce more muscle growth than training them once, provided recovery is adequate.